
How to Consolidate Sales Orders & Shipments in D365 Business Central
- Heather Watson

- Apr 20
- 4 min read
Updated: 3 days ago
Learn how to consolidate sales orders and shipments in Dynamics 365 Business Central.

In some billing scenarios, customers require all shipments within a specific time period, such as a calendar month, to be invoiced together instead of receiving separate invoices for each shipment or sales order. This is common for customers who prefer consolidated billing statements for easier reconciliation and internal approvals.
Microsoft Dynamics 365 Business Central supports this requirement by allowing you to create a single sales invoice that combines multiple posted sales shipments for the same customer, even when those shipments originated from different sales orders. By pulling posted shipment lines into one consolidated invoice, you can streamline your invoicing process, reduce administrative effort, and ensure compliance with customer-specific billing agreements.
Before using this process, the customer’s sales orders must already exist and have shipments posted against them. A single sales order may include one or multiple posted shipments, especially when items are delivered in stages. These posted shipment records serve as the source for the consolidated invoice. Business Central maintains the link between shipment lines and their originating sales orders to ensure accurate invoicing and to prevent duplicate billing.
What Must Be in Place Before Consolidating Invoices
Before creating a consolidated sales invoice, the customer’s sales orders must already be created and have shipments posted. In the example shown, there are three sales orders for the same customer. Each order should have a Status of Released and Completely Shipped set to Yes. This confirms that all items on each order have been shipped and that corresponding Posted Sales Shipment records exist.
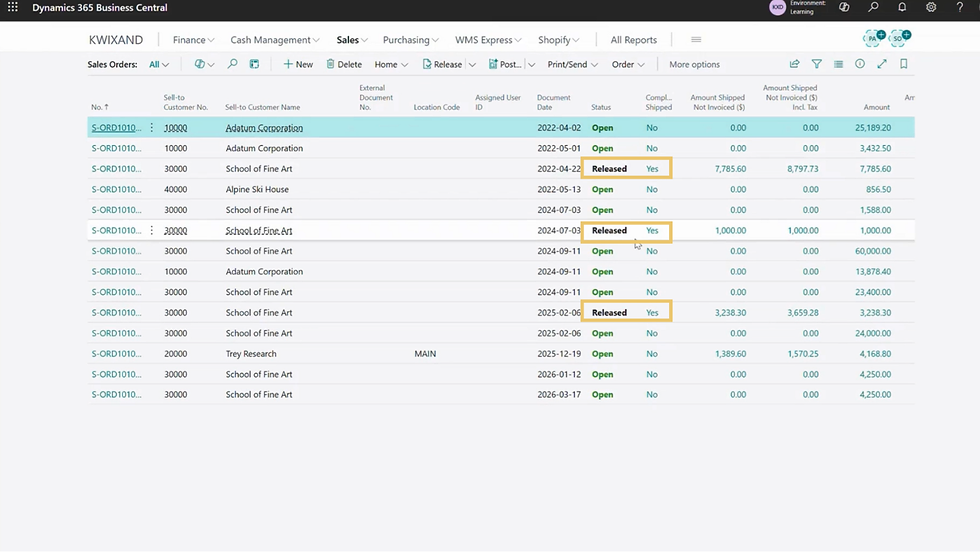
Depending on the fulfilment process, a single sales order may generate one or multiple posted shipments. Multiple shipments typically occur when items are delivered in stages or from different locations. Regardless of how many shipments were created, all posted shipment lines for the customer can be used as the source for a consolidated invoice.
These posted shipment records are what Business Central uses to build the consolidated invoice. By pulling all relevant shipment lines into one sales invoice, you ensure that every shipped quantity is invoiced together in a single document, without missing or duplicating billable lines.
Creating the Sales Invoice
Once all shipments have been posted, you can create the consolidated invoice that will combine them into a single billing document.
Search for and open Sales Invoices. You can also navigate there from Sales > Sales Orders.
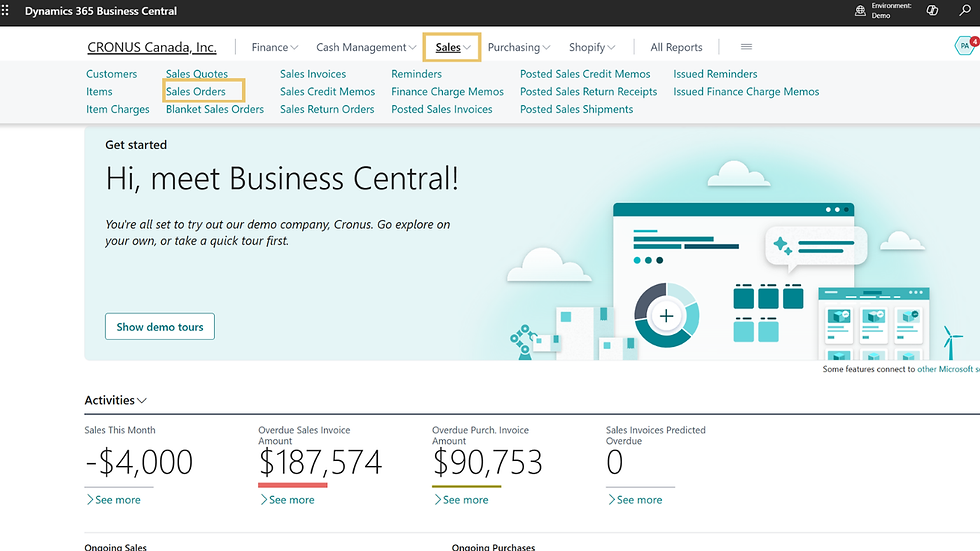
Select New to create a blank invoice.

In the Customer Name field, choose the customer who will receive the consolidated invoice.
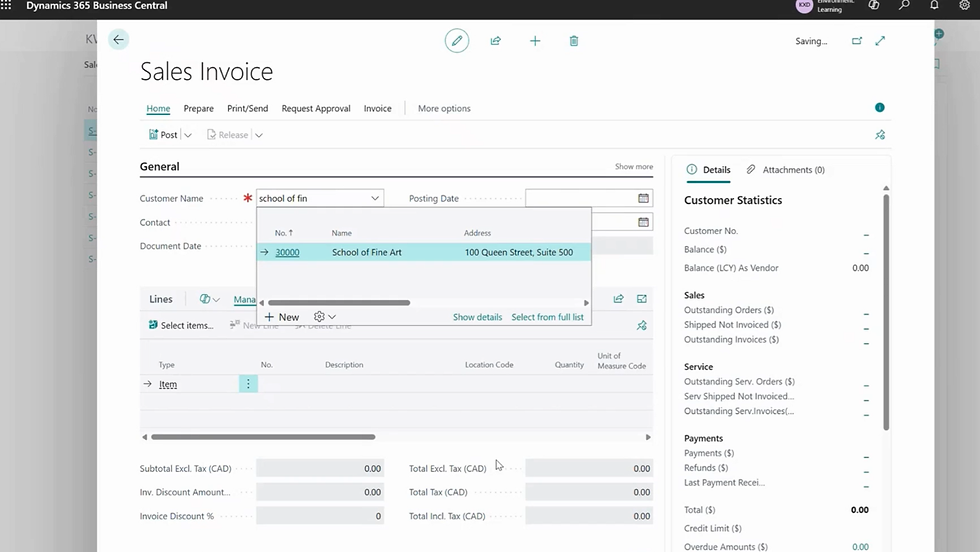
Complete the Posting Date and other header fields as required by your company’s invoicing policy.

Leave the lines area blank for now, the shipment lines will be added in the next step using the Get Shipment Lines function.
Adding Shipment Lines to the Invoice
With the sales invoice header created, the next step is to bring in the posted shipment lines from the relevant sales orders.
On the Sales Invoice, go to the Lines section.

On the ribbon, select Lines > Functions > Get Shipment Lines.

In the Get Shipment Lines window, review the list of available posted shipments for the selected customer. Shipments from multiple sales orders will appear here, including orders with multiple shipment postings.

Select all the shipment lines you wish to include on the invoice. Click OK to pull the selected shipment lines onto the Sales Invoice.

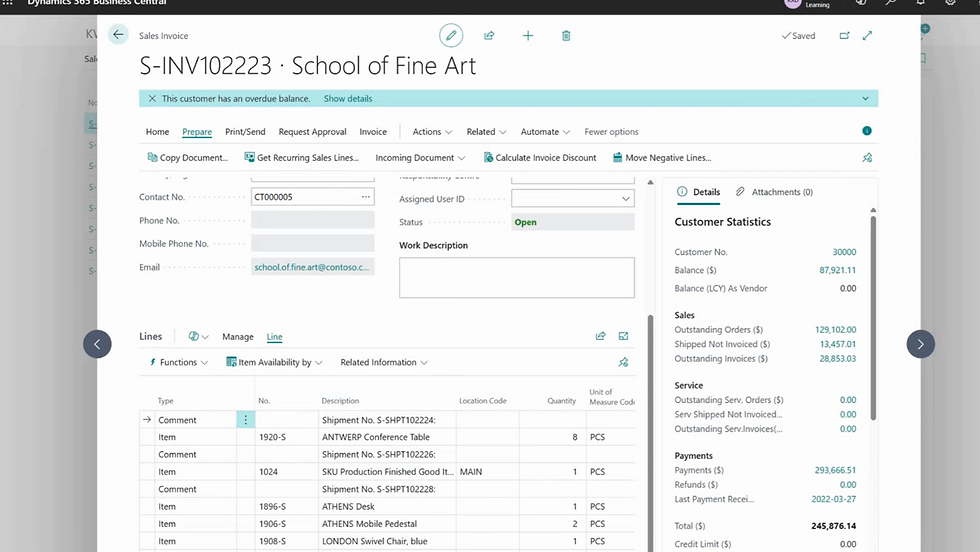
Review the invoice lines to ensure quantities, descriptions, and prices are correct. At this point, the invoice contains all the shipment lines from the sales orders you selected, consolidated into a single document for billing.
Posting the Invoice and Updating the Sales Order
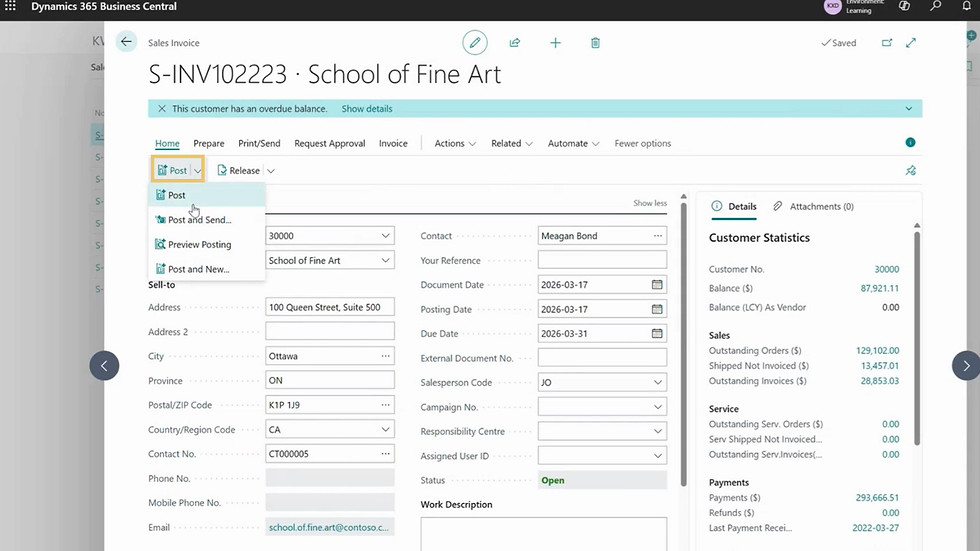
Once the shipment lines have been added and reviewed, you can complete the billing process by clicking Home.
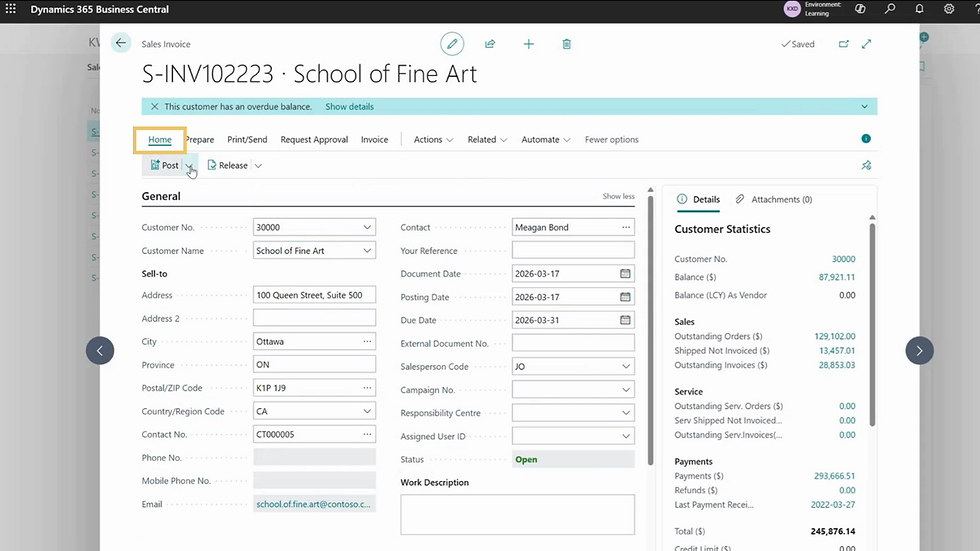
Select Post or Post and Send (depending on whether you want to send the invoice to the customer immediately). If you'd like to review, you can also click Preview Posting.
Confirm the posting action when prompted.

Business Central will create a Posted Sales Invoice containing all the shipment lines you selected.
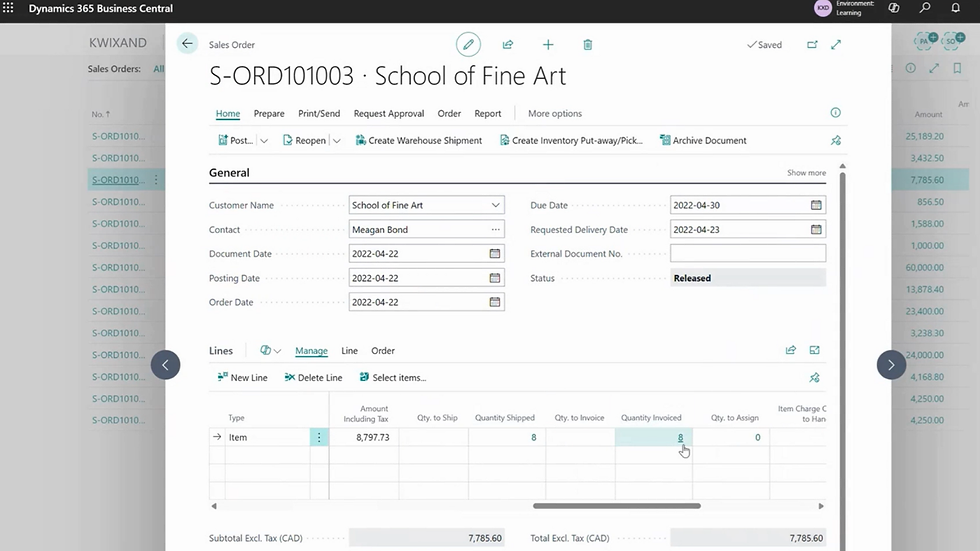
Each sales order linked to the invoiced shipment lines will update automatically. The Quantity Invoiced field for each order line will reflect the invoiced amount. If all lines on the order are fully shipped and invoiced, the order will be completed.
Orders with remaining quantities will stay Released until the remaining items are shipped and invoiced. This process ensures that all shipments for the period are captured in one invoice, meeting customer requirements while keeping order and shipment records accurate in Business Central.
Note: In Business Central, with the consolidated sales invoice process the sales orders remain in Released status even after being fully shipped and invoiced. To remove them from the open orders list, you must manually delete them. If Archive Orders is enabled in Sales & Receivables Setup, the system will store a copy in the Archived Sales Orders list before deletion for audit purposes.
Training Video: How to Consolidate Sales Orders & Shipments in D365 Business Central
Got Questions? Kwixand Solutions Can Help
Feel free to get in touch with the team at Kwixand Solutions for assistance if you still have questions. Don't forget to subscribe to our YouTube channel for more Business Central training videos, and stay connected with us on LinkedIn, Facebook, and Instagram, for the latest updates.


