How to Create and Edit a New Budget in Dynamics 365 Business Central
- Kwixand Team

- Aug 26, 2025
- 4 min read
Learn how to create, edit, and manage new budgets in your Microsoft Dynamics 365 Business Central solution
Budgets are a foundational element in Microsoft Dynamics 365 Business Central, helping you plan, control, and analyze financial performance across your organization. In this training post, we’ll walk you through how to set up a new budget from scratch, import/export budgets with Excel and copy budgets for the next fiscal year to make your year-end transactions easier.
Create and Edit a New Budget
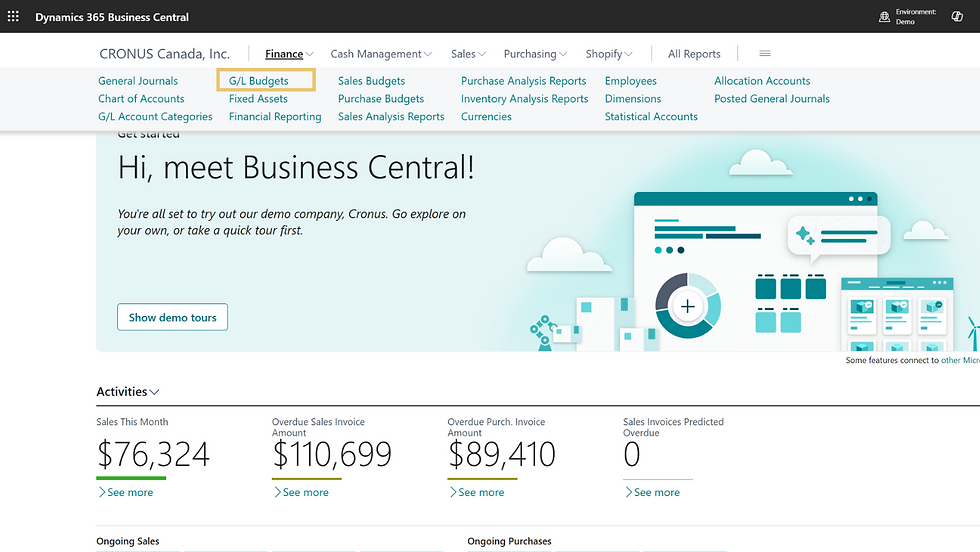
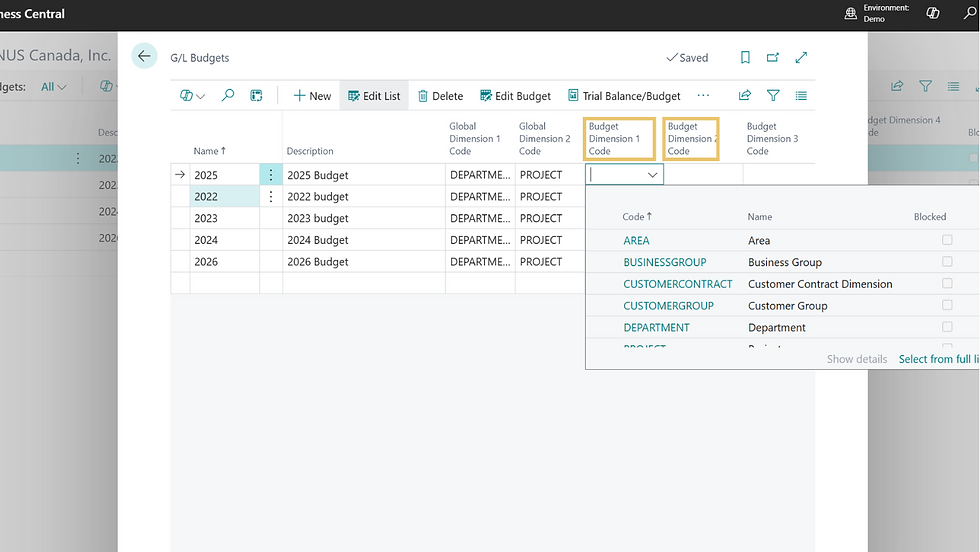
To Access the Budgeting Module, go to the Finance dropdown in the main navigation bar and select GL Budgets from the list.
You’ll now see a list of any existing budgets. From here, you can view, edit, or create new ones.
To create a new budget, click on New.
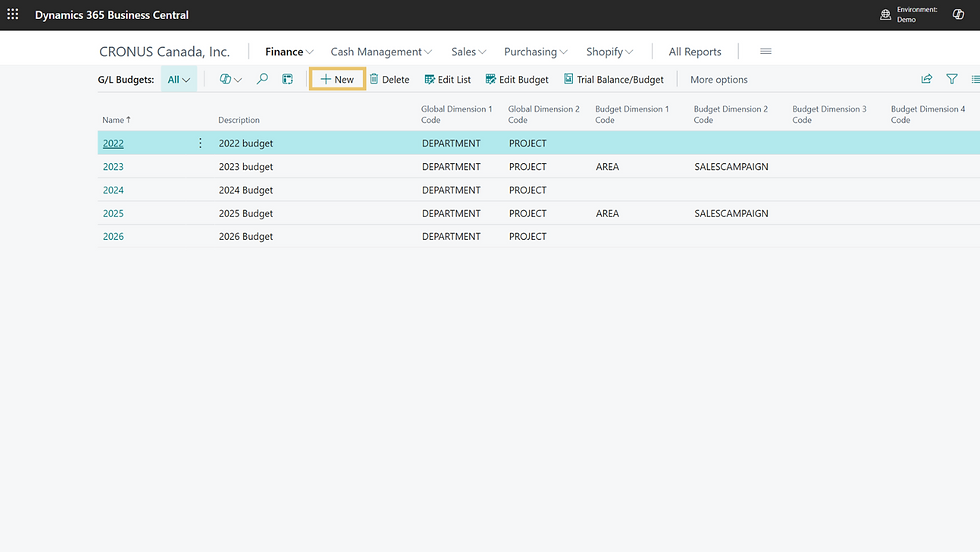
Enter a Budget Name and a Description (this can match the name or provide additional context).
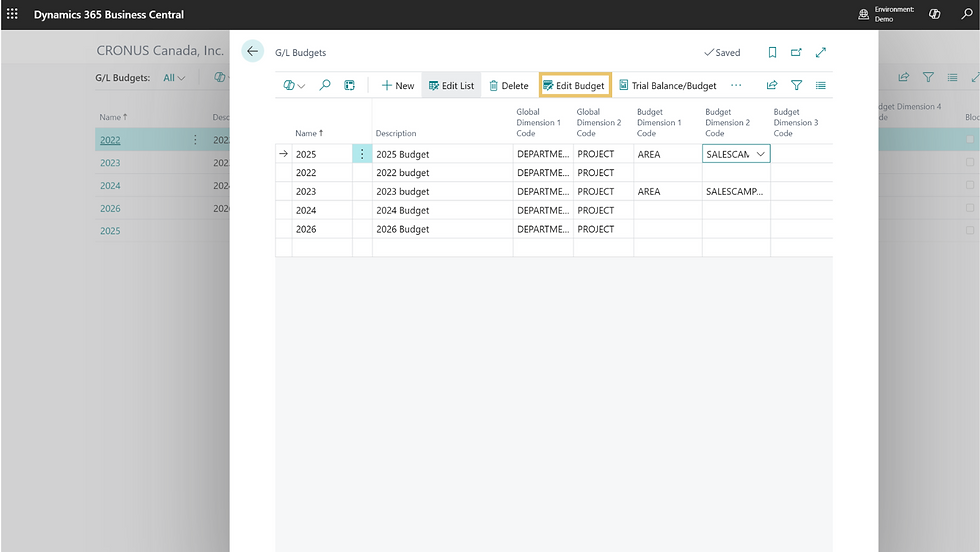
The default Global Dimensions will auto-populate, but you can add a budget dimension code by choosing from the dropdown menu.
Then click on Edit Budget.
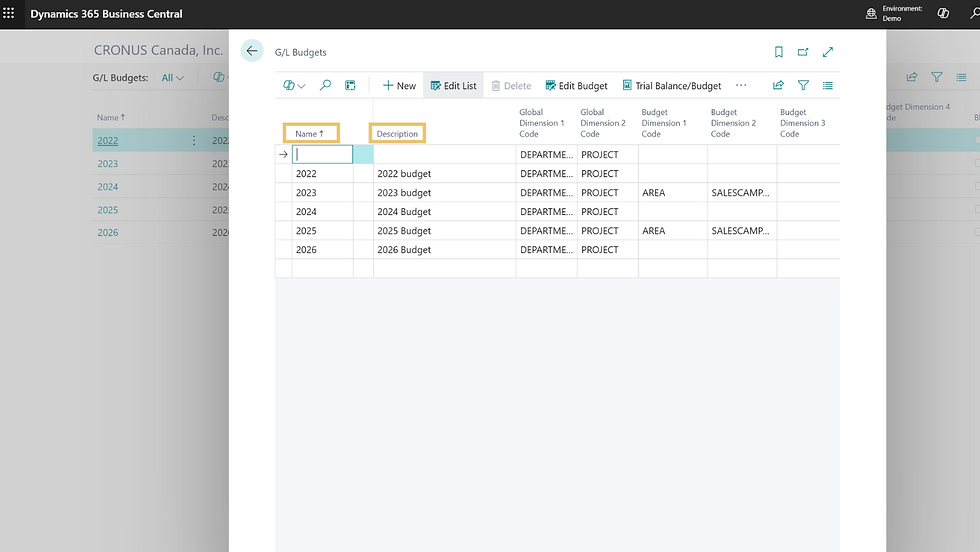
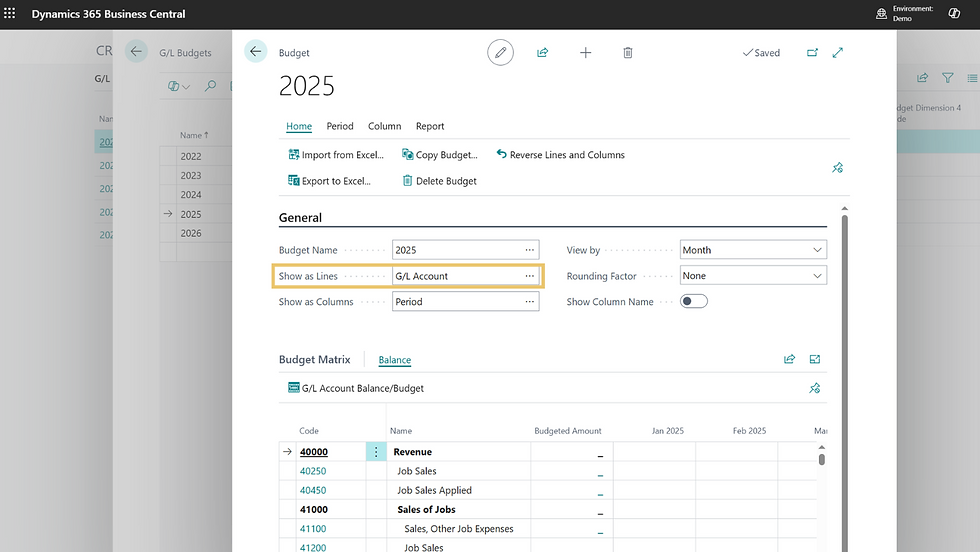
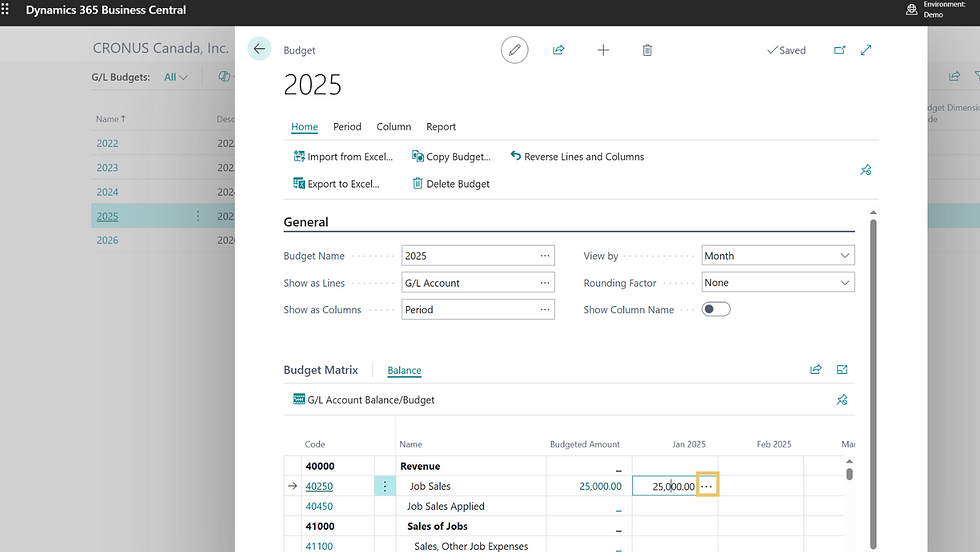
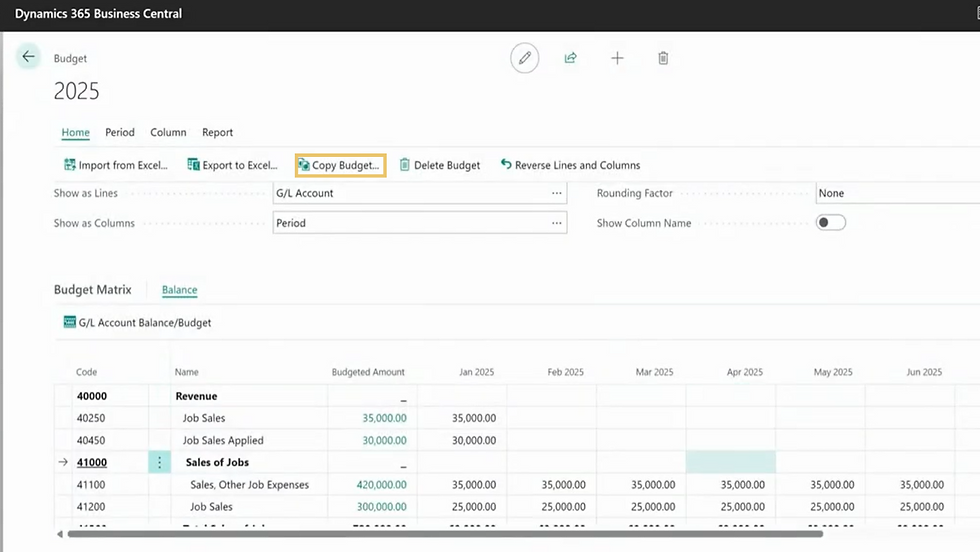
This will bring up the budget card where you can edit individual lines within the budget. These lines are pulled from your chart of accounts structure.
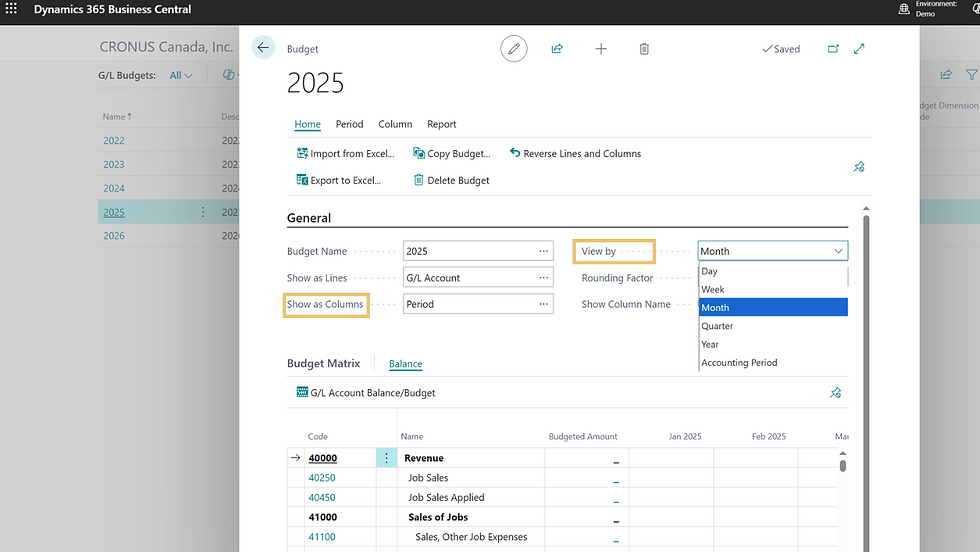
While the most common display is GL account, you can customize the way these lines are displayed, click on Show As Lines.
Then select the value from the drop-down menu and click OK.
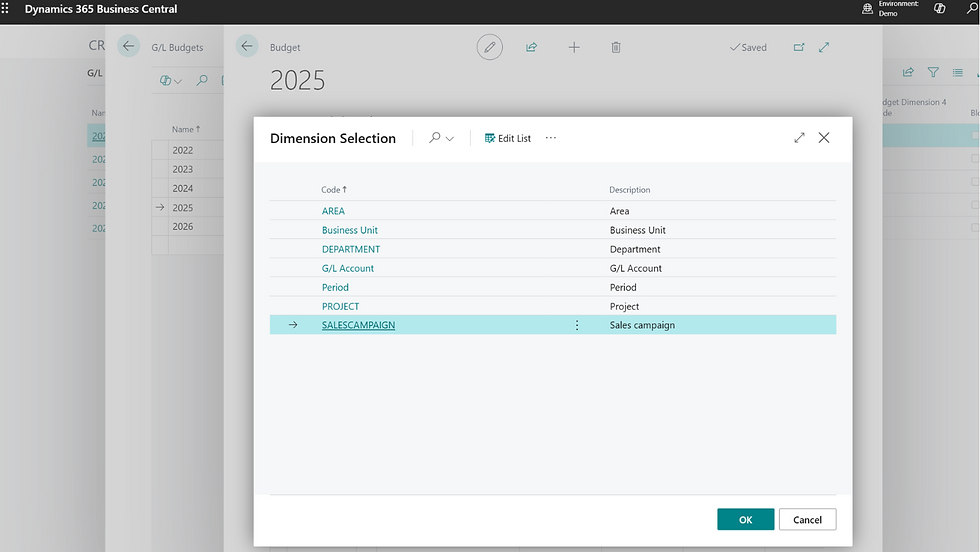
You can also change the columns to display as periods, projects, or another dimension of your choosing by clicking on Show As Columns and selecting the value you want from the dropdown menu.
For this example, we’ve used period. To specify whether it’s daily, weekly, monthly, quarterly, or yearly, or the accounting period view, select View By and choose your option from the drop-down menu.
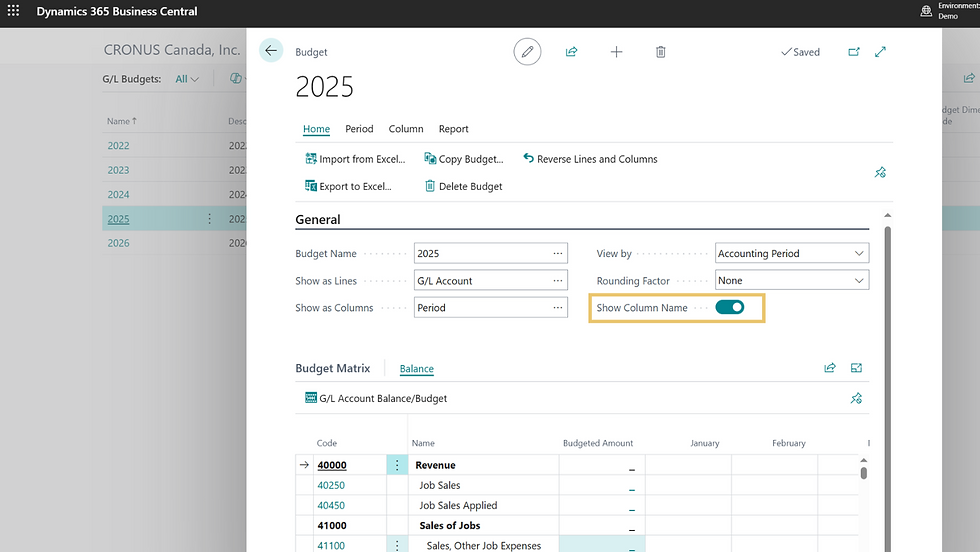
Note: You can toggle "Show Column Name" to display the name of the month instead of start dates.
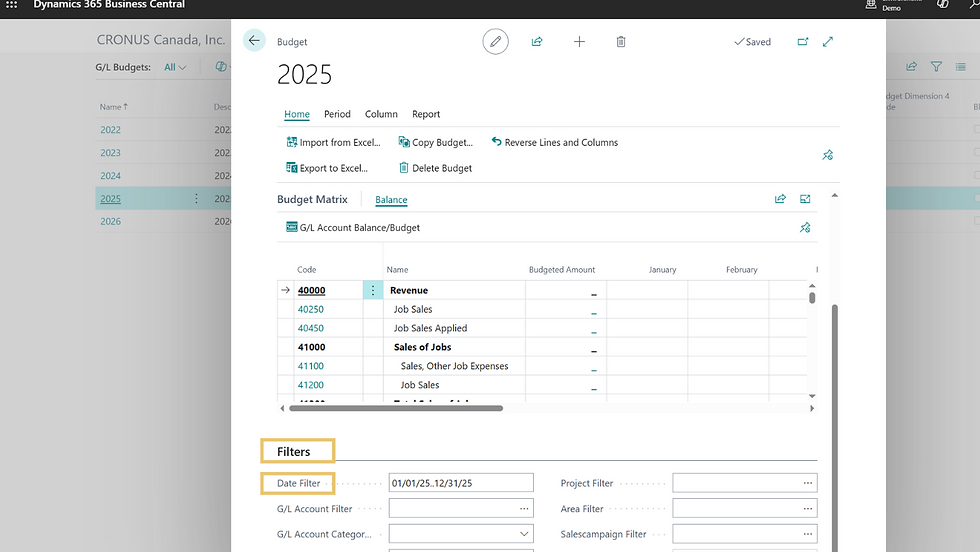
Under these settings, the period dates will automatically set to a calendar year view with 12 periods, but you can adjust the dates to fit your budget timeline by opening the filters tab and entering your custom dates in the date filter field.
You can use this as an ongoing budget, year over year, by extending the end date in the date filter field. Then you can adjust your view by period to a quarterly or yearly view to see the full scope of the budget.
Once your dates are set, click into any cell that aligns with a line item and period and enter your budget amount. This automatically creates a GL Budget Entry.
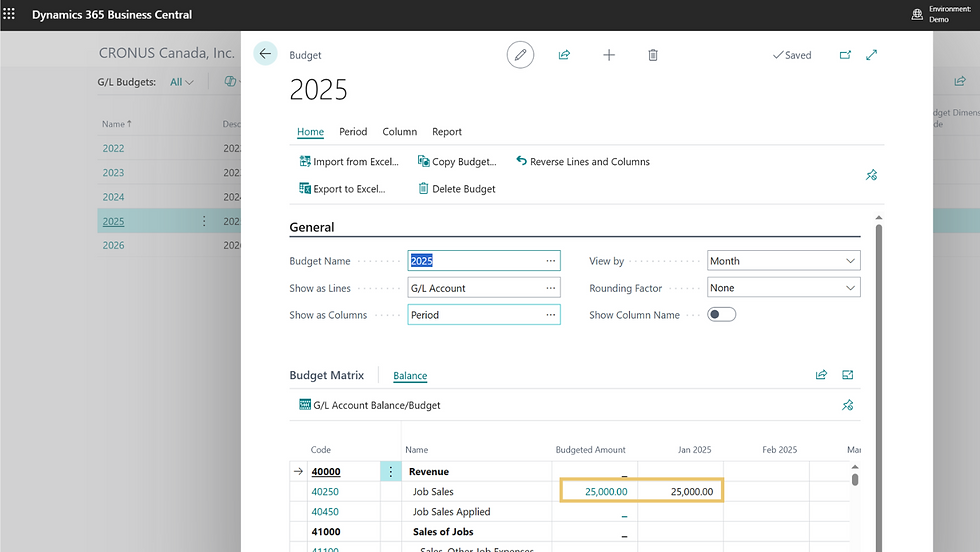
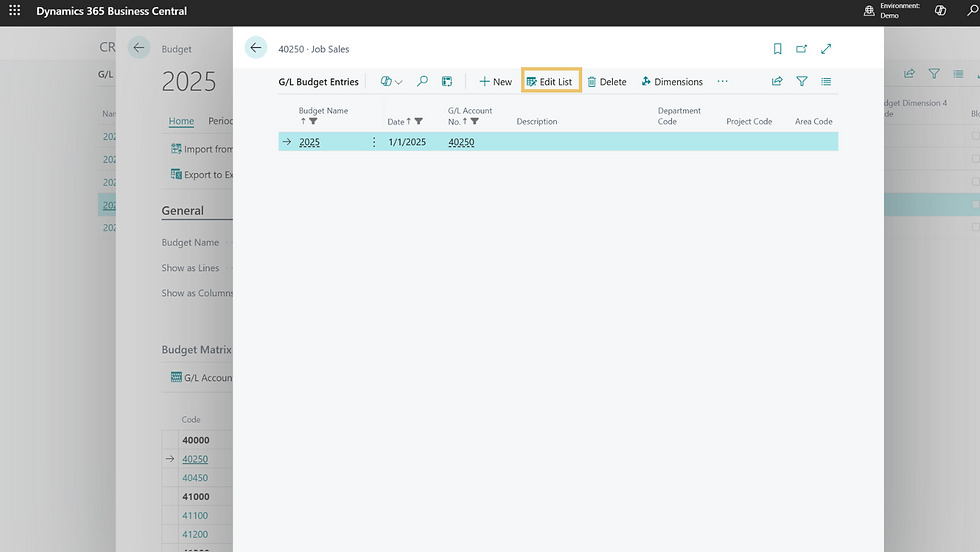
To view the individual GL budget entries, click on the ellipsis next to the amount field to open the GL Budget Entries Card.
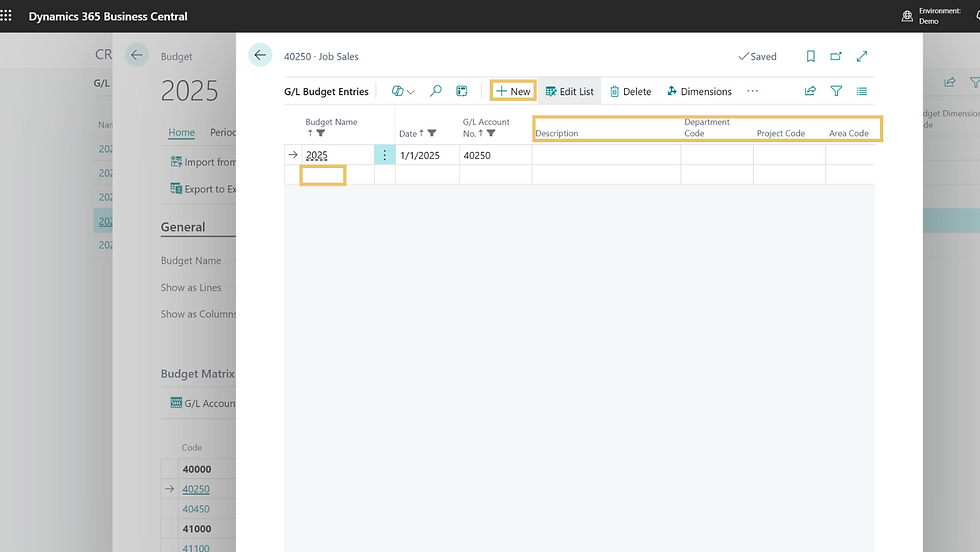
Here, you can click Edit List to modify existing amounts or add new entries to the line item.
You can also assign project or department dimensions or add a description. You can add a new budget entry by selecting new from the menu at the top of the card, or if you have already clicked edit list, simply click in the open field at the bottom of the list and enter the amount.
To save your changes, click on the edit list button again, and you'll return to the budget card.
Export and Import to Excel
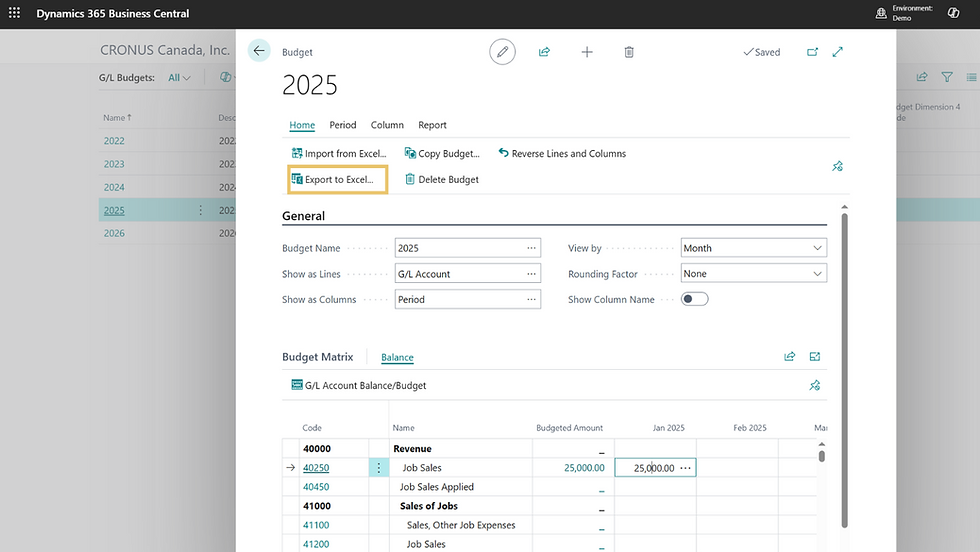
Once you have created your budget entries, you can export your budget to excel, by clicking Export to Excel in the budget menu.
This will open a new screen. Input details such as start date, number of periods, period length, and specify any optional dimension filters you want to use as filters in the report. Click OK to generate the report immediately.
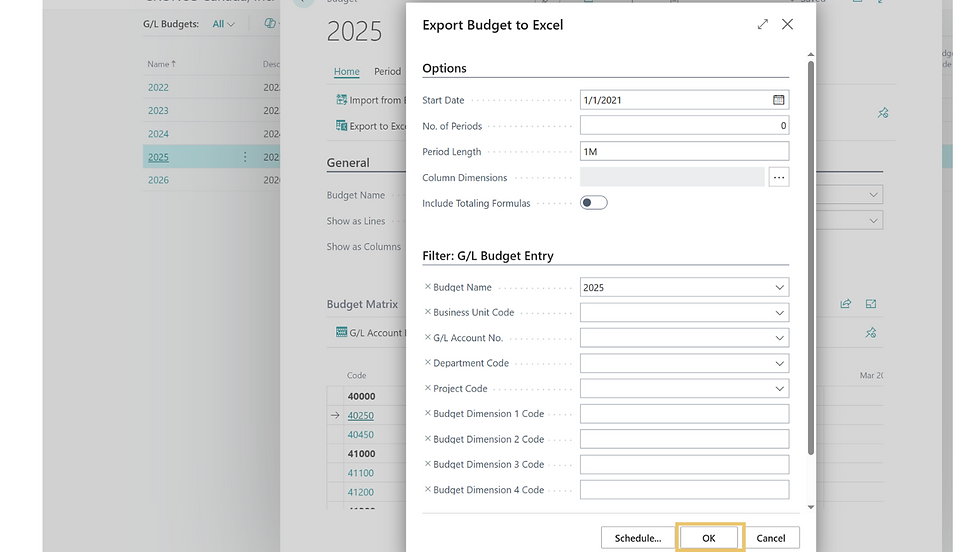
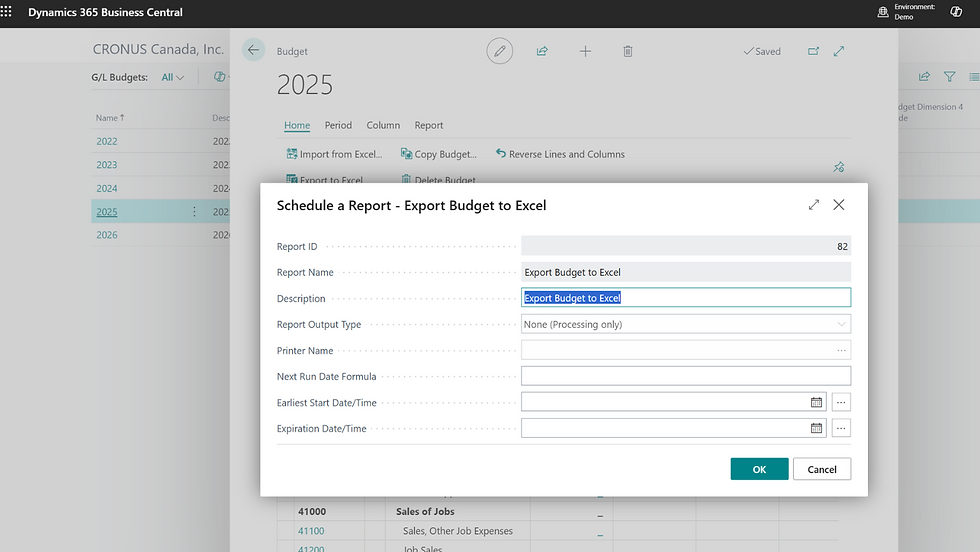
Or you can schedule it in the future using a formula.
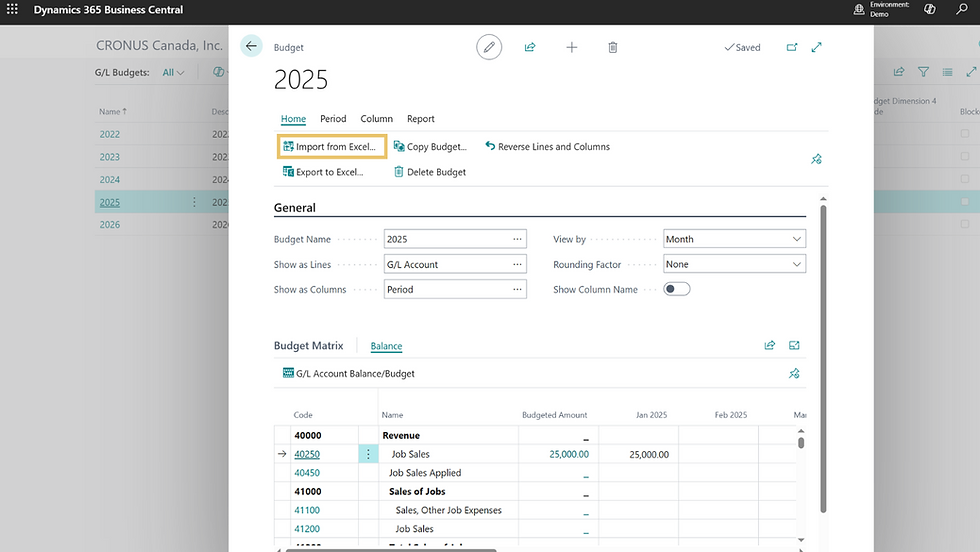
If you prefer working in Excel, you can enter the budget amounts for each period and line item on the spreadsheet, then import it back into Business Central. Once you’ve entered all of the budget information into the Excel file, save the document and return to the Budget Card.
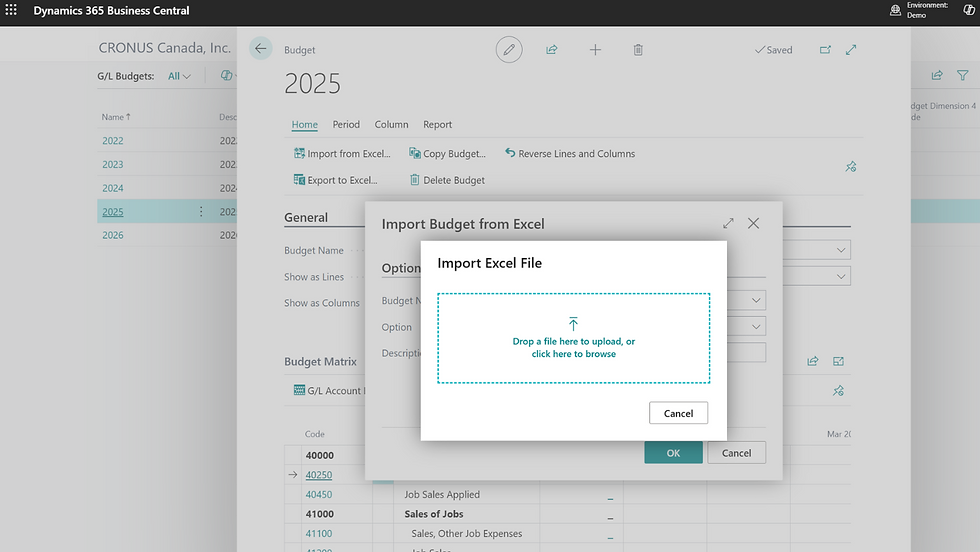
Click Import from Excel.
Select the budget you want to apply the data to and update the description. Choose whether to replace the current budget entries, or add new entries from the options dropdown menu. After entering all the information, click OK.
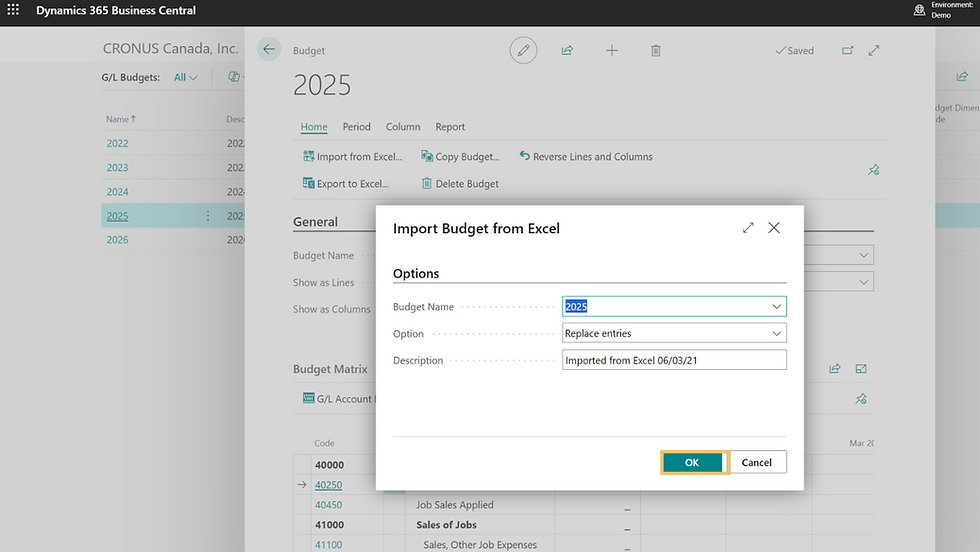
Then drag and drop your Excel file into the upload window. When prompted, click Yes on the pop-up, then click OK to complete the import and update the budget matrix.
You can now edit imported entries just like manually entered ones.
Copy a Budget
To roll your current budget into the next year, click Copy Budget.
Choose the budget you want to copy from and enter the required details.
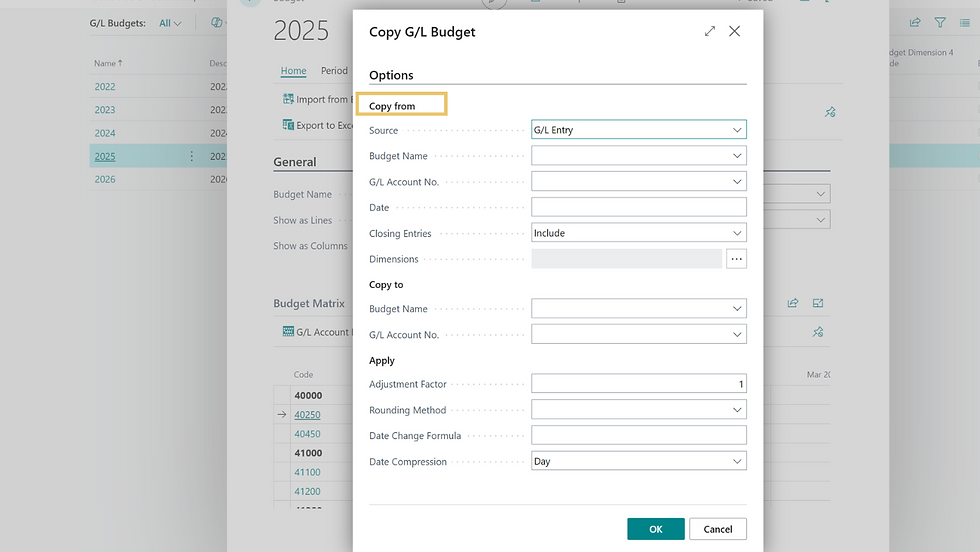
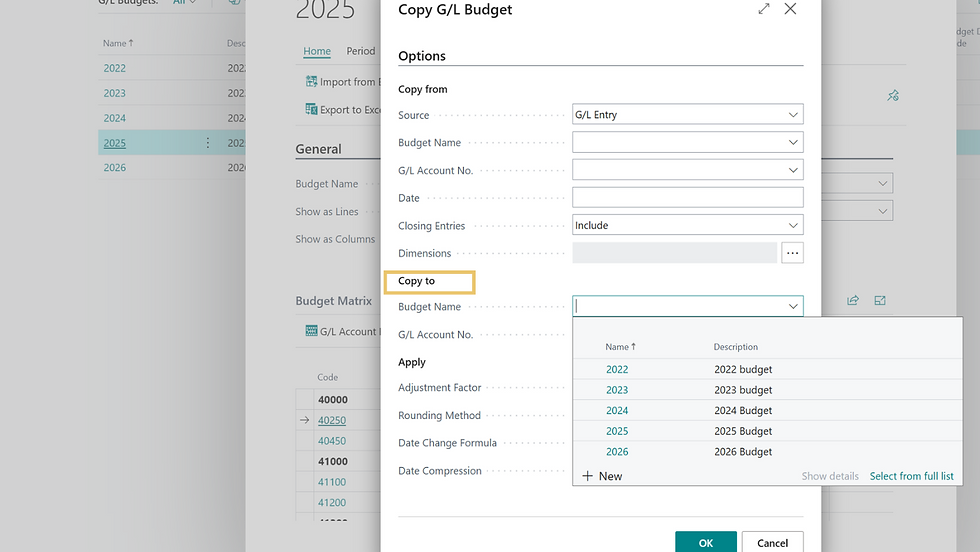
Then, select an existing budget to copy to from the dropdown menu, or click New to create a new budget using the copied data. You can also choose to copy entries from specific GL accounts only, if needed.
Use the Adjustment Factor line to apply a percentage increase (e.g., 5%) to all copied entries.
If using an adjustment, be sure to select your Rounding Method, either: To the nearest whole number, or to the nearest thousand dollars.

Once all options are selected, click OK. Click Yes in the confirmation pop-up, then select OK to complete the process.
You can now access and edit your newly copied budget and its adjusted budget entries.
Watch the Training Video: How to Create and Edit a New Budget in Dynamics 365 Business Central
Get in touch with the Kwixand Solutions team if you have any questions about budgets or any other Dynamics 365 Business Central related enquiry. For more training videos, check out and subscribe to our Youtube channel.