How To Personalize Your Home Screen in D365 Business Central
- Kwixand Team

- Feb 20, 2024
- 3 min read
Discover how to personalize your home screen in D365 Business Central. Optimize your workflow and create a workspace that suits your unique requirements.

Unlock the full potential of Dynamics 365 Business Central by personalizing your home screen to fit your unique workflow. Efficiency is critical in today’s workplace and personalizing your dashboard is the first step toward optimizing how you work. Personalizing your D365 Business Central home screen is beneficial as it helps you to:
Access frequently used features faster
Create an intuitive, tailored interface
View key metrics and tasks at a glance
Align the dashboard to your specific job role
In this article, we’ll walk you through how to customize your home screen layout, add or remove dashboard fields, reset your dashboard to default, and freeze columns in list views.
Access Personalization Mode
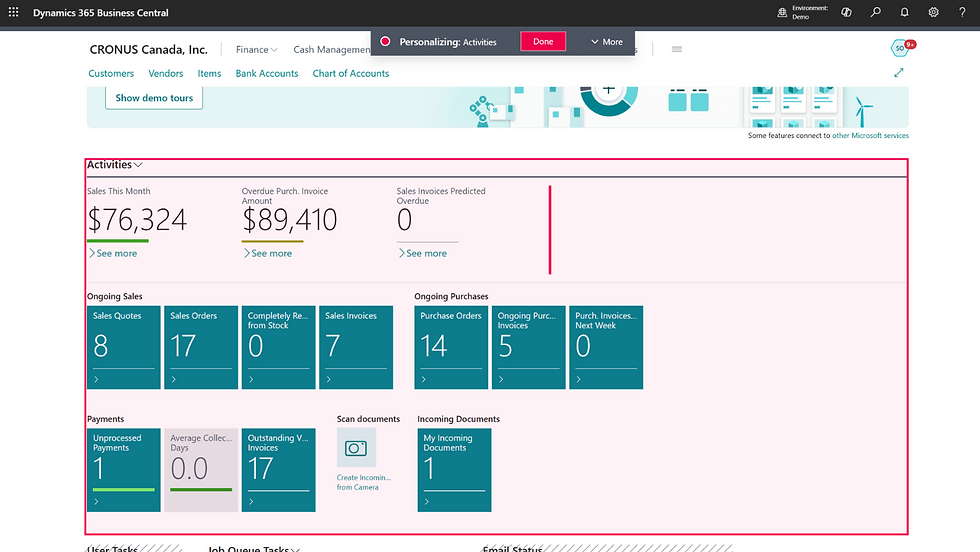
First, select the gear icon in the top right corner of your screen and select Personalize from the settings menu.

Once you do this, you will see that your screen changes slightly and a personalization toolbar will appear at the top.
If you hover over items you'll see a red icon. That red icon allows you to hide, show, or move any of the items on your home screen.

Hide or Move Dashboard Items
To hide an item, click on the red icon and select hide. Once the item is hidden it will be faded out on your screen.

To move items, click on the red icon and drag your selected item to a new location on the dashboard.
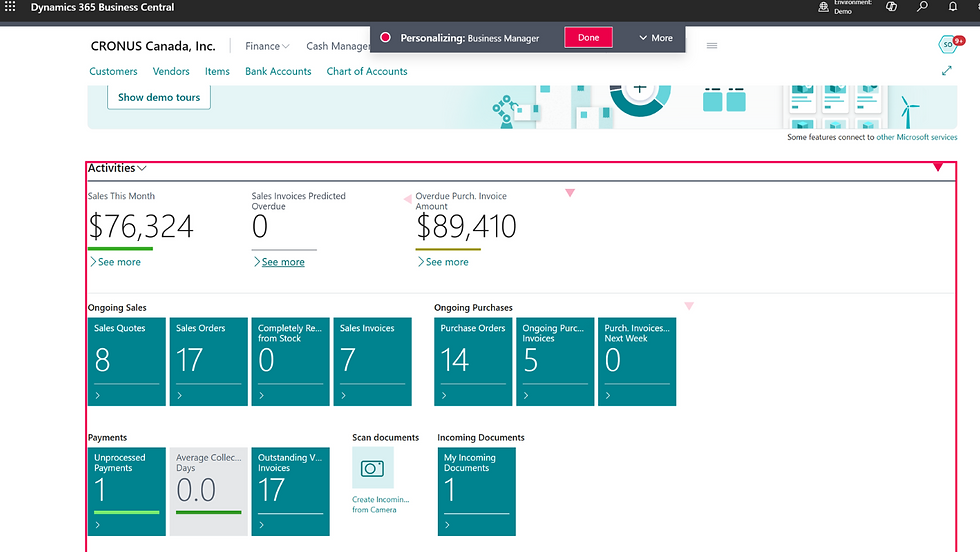
You can rearrange any of the elements on this dashboard to suit your workflow and prioritize frequently used tools.
Add or Remove Fields
To add a field, click Add Field in the personalization toolbar. This will open up a field panel on the right side of the screen.

You can browse through the recommended or advanced field options. Click on the field to add it to your dashboard and select Done.

Freeze a Column in the Customer List
You can also personalize list views for improved visibility. For example, a useful pesonalization is freezing the customer name column so that it still allows you to see it as you scroll through your data.
To freeze a column, navigate to your Customer List by selecting Customers at the top of your screen.

Your Customer List page will open. Click the gear icon and select Personalize.

Locate the Customer Name column (or any column you want to freeze). Click the red icon in the column header and select Set Freeze Pane.

The column will now stay fixed as you scroll horizontally.
Reset to Default Settings (Optional)
If you want to start fresh or undo your changes while you are personalizing your dashboard, click Clear Personalization in the toolbar. For this example, we will select All.

Confirm by clicking Yes in the pop-up screen. This will remove all customizations and restore the default layout.

Training Video: How To Personalize Your Home Screen in D365 Business Central
If you have any questions about this topic or any other Dynamics 365 related enquiry, get in touch with the experts at Kwixand Solutions. For more Business Central training videos, don't forget to subscribe to our YouTube channel and follow us on LinkedIn, Facebook, and Instagram.