How to Schedule Reports in D365 Business Central
- Kwixand Team

- Nov 23, 2023
- 2 min read
Learn how to schedule reports in Microsoft Dynamics 365 Business Central.

When manually running reports, Business Central offers multiple options for the report output, such as printing, saving, or emailing. An additional option is to have the reports run automatically based on a predefined schedule. In this tutorial, we will explain the process. of setting up scheduled reports.
First, select the report you want to schedule in the Outstanding Purchase Order Status page.

From the options at the bottom of the form, select Send To.

In the file type window, select Schedule, and then click OK.

In the next Run Date Formula field, enter a date formula that corresponds to when you would like the report to run. For example, CM+1D indicates that the report will run on the first day of every month.
In the Earliest Start Date/Time field, indicate a date and time from which the report schedule is valid. The report will not run before the value in this field.
In the Expiration Date/Time field, indicate a date and optionally a time after which the report should no longer run.

When ready, click OK.
The report will now be scheduled and a Job Queue Entry will be created.
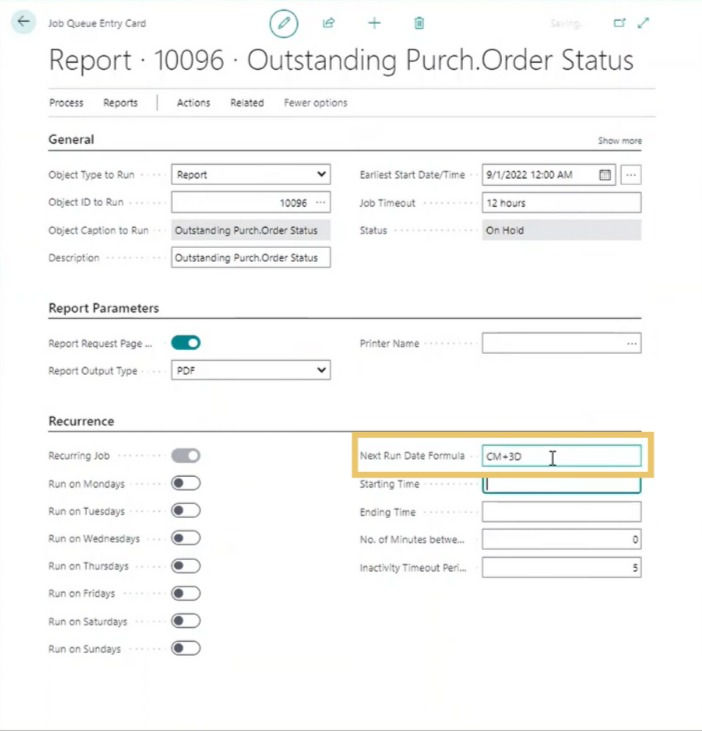
To view the schedule, open Job Queue Entries.

Locate the correct record and click the Status to open it.

To make any changes, you must first put the scheduled job on hold. Select Process to open the menu.

Click Set On Hold to pause the report.

Now that the report is on hold, you can update the schedule using the Next Run Date Formula field.

Select the Process tab again and click Set Status to Ready to activate the new record schedule.

You can test the output by manually running the report. Open the Process tab and select Run Once (foreground).

When prompted, select Yes to create a non-recurrent copy of the job.

Every time the rescheduled job runs, an entry will be created in the Report Inbox on your Roll Center Homepage. Click on the report's Description to download the file.

Training Video: How to Schedule Reports in D365 Business Central
If you have any questions about this topic or any other Dynamics 365 related enquiry, get in touch with the experts at Kwixand Solutions. For more Business Central training videos, don't forget to subscribe to our YouTube channel and follow us on LinkedIn, Facebook, Instagram, and Twitter.


