
How to Export to and Edit in Excel from Dynamics 365 Business Central
- Kwixand Team

- Apr 16, 2024
- 3 min read
Updated: Jul 8, 2024
Learn how to seamlessly export and edit Dynamics 365 Business Central data in Excel. Unlock the full potential of your platform with our comprehensive guide!

Unlock the full potential of your Dynamics 365 Business Central platform by taking advantage of its seamless integration with Microsoft 365 programs like Microsoft Excel. In this comprehensive guide, we'll show you how easy it is to export and edit Business Central data in Excel. Discover how to leverage Excel's familiar interface to effortlessly manipulate and update information in Business Central.
How to Export to Excel from Dynamics 365 Business Central
The integration of Excel in Business Central allows you to export and edit Business Central information in Excel. Let’s start by exporting and editing the Customer List in Excel. First, click “Customers” in the Navigation Menu on the left-hand side of your Business Central home screen.

Once you’re in the Customer List, go to the Action Bar and select the Share Icon, which is the leftmost icon in the Action Bar.

From here, you can choose to open the list in Excel or edit in Excel. If you open in Excel, Business Central will take the data from that page and put it in Excel. This would be the same if you were working with any of the other lists in Business Central, as long as the Share Icon is present, you have the ability to move your data over to Excel.

Once you click "Open in Excel", your data will show in the Excel spreadsheet.

How to Edit in Excel from Dynamics 365 Business Central
Next, let’s take a look at how to edit Business Central data in Excel. To start, open the list you want to edit, we will use the Item List.

Click the Share Icon in the Item List Action Bar.

Then, select “Edit in Excel”.

An Excel file will automatically download. Launch Excel and open the download. The file will appear in a protected view, so you will need to select “Enable Editing” at the top of the screen to move from a view only file to an editable file.

Once you do this, your data will populate in the spreadsheet and your Microsoft Dynamics Data Connector will open on the right-hand side of the screen. If this is your first time editing a Business Central file in Excel, you may need to give permissions and sign in to initiate the link between the two programs. Just follow the prompts until you see the green Data Connector bar with your account information.

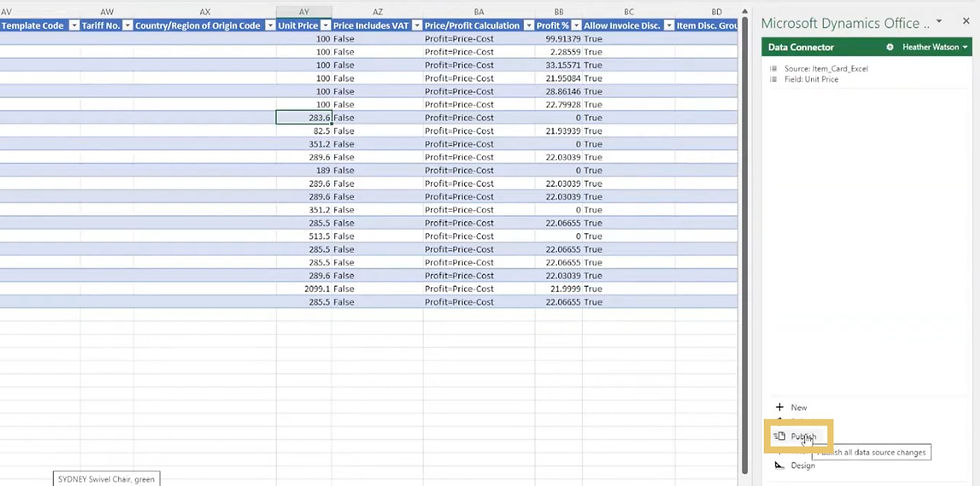
Now, you can make your changes to the data in the Excel spreadsheet. For this example, we will update the unit prices on some of these items. Scroll over to find the Unit Price column and enter the updated prices.

When you are done with your changes, you will need to put the updated data back into Business Central. In the Data Connector, select “Publish” from the options at the bottom.
You can see that the update is successful when the message “Publish successful – workbook updated” appear at the very bottom of the Data Connector.

Now, you can close the workbook. You don't need to save it since you have already imported the changes back into Business Central. However, when you first come back into Business Central, you will notice that the changes are not yet visible.

All you need to do is right click on any blank part of the screen and select "Reload frame" to reload the page.

Once you do this, you will see the data has been updated to reflect the changes you made on the Excel spreadsheet.

Training Video: How to Export to and Edit in Excel from Dynamics 365 Business Central
Still have questions about exporting and editing in Excel or anything related to Dynamics 365 Business Central? Feel free to get in touch with the team at Kwixand Solutions for expert assistance. Don't forget to subscribe to our YouTube channel for more Business Central training videos, and stay connected with us on LinkedIn, Facebook, Instagram, and Twitter for the latest updates.


